Like everything in Dragon of Icespire Peak, there is a lot of lore, history, and backstory to each area on the map.
Most of the time, these added details would be great information for Dungeons Masters (DMs) who are used to making massive worlds or even those who have played a campaign near Phandalin before.
But the majority of people picking up Dragon of Icespire Peak are new Dungeon Masters, so all of the extra detail just overcomplicates their game.
I aim to strip back the Dwarven Excavation content and leave you with a realistic guide to make this session epic for you and your friends!
What to Expect in the Dwarven Excavation
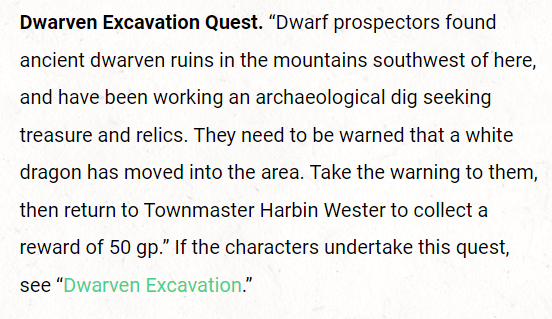
Here is a brief overview of the Dwarven Excavation quest. The parties’ one aim is to warn the dwarfs mining in this area that a white dragon has been spotted. After doing this, the players can go back to Phandalin and collect their 50gp.
You can find this information on page 10 of the adventure book.
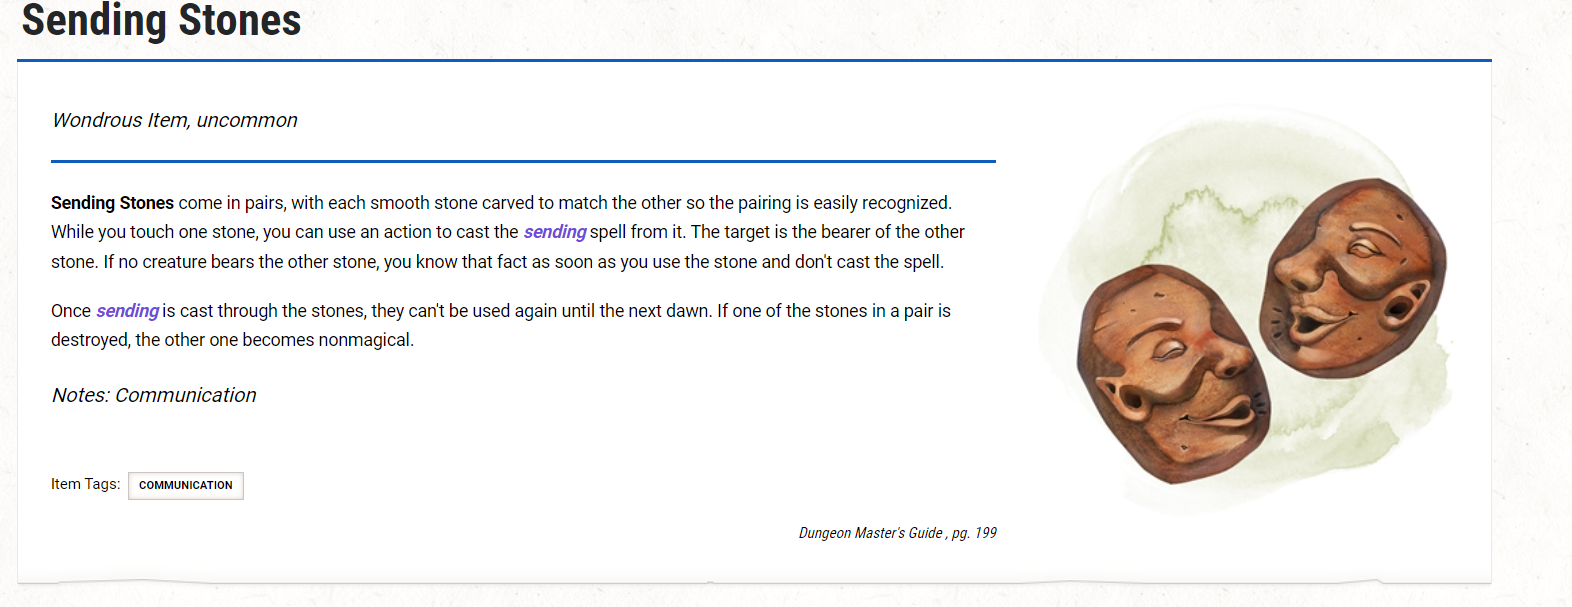
Grateful for the warning, the dwarf offers the party a quest of their own. If the players can clear the mine of monsters, then the miners will give them some sending stones. This is what we call a “plot hook,” although it is a weak one as there isn’t a lot of plot involved.
Still, the players don’t have any magical items yet, so this small addition to their bag will feel like a gold mine (pun intended).
The Sending Stones can be found on page 199 of the Dungeon Master’s Guide or in the packet of magic items handouts.
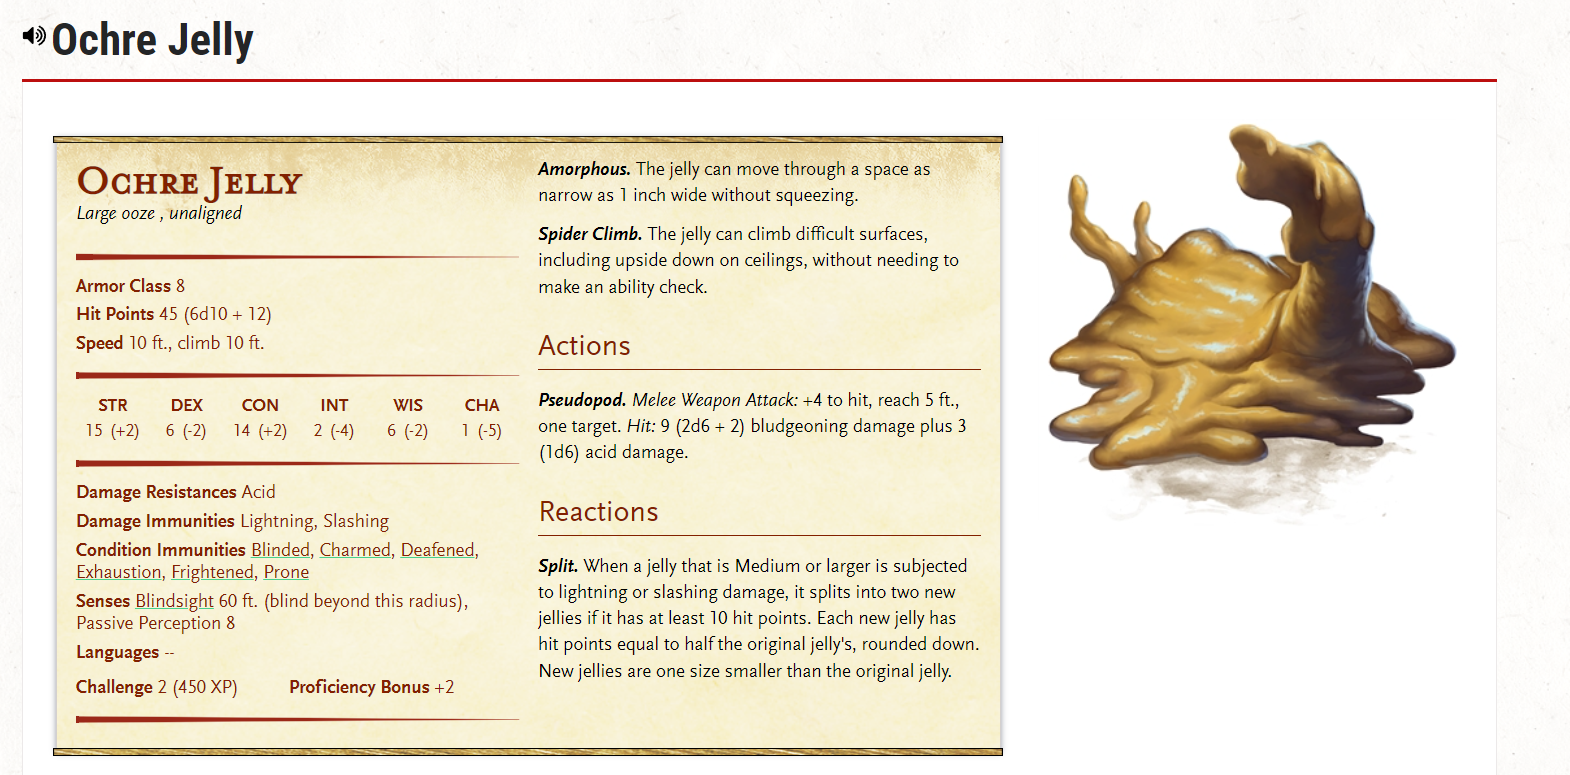
If the players accept this quest, they will enter a dark cave searching for beasts. It’s only when they reach the middle that they find one or two Ochre Jellies. They are lost souls of the priests that used to live here, turned into unfeeling and hungry monsters. They can be found on page 61 of your adventure book or page 243 of the Monster Manual.
Once the monsters are defeated, there are no other threats in the cave. However, there is a hidden room with a glowing gem being held by a sketchy statue. If a player gets greedy and reaches for the gem, they risk receiving 22 piercing damage as the booby trap is set off.
Lastly, as the players leave the mine feeling triumphant, they see Orcs stampeding into the clearing, and another battle begins.
Stripping away all of the empty rooms and (interesting, but never mentioned again) backstory, this is the essence of the quest.
If you have a warlock player or a dwarven player, it might be interesting to weave Abbathor (the dwarven god of greed) into the story, as this was the god prayed to by previous civilizations in the mine.
However, Abbathor is never mentioned again in the campaign, so it would be easy to cut him out if you cannot find a connection. Remember that you are under no obligation to create a connection either. All you need to do is mold the story to match your vision.
Connecting Stories and Knowing Your Players
In our previous article, “Setting Up Phandalin For Your First Session,” we suggested giving the quest to your players through the retired-miner-turned-tavern-owner Toblen.
If you used this suggestion or created your own mini-history to connect Phandalin and the dwarven mines, be sure to carry on this story. There are two Non-Player Characters (NPCs) in this quest, and they are called Dazlyn and Norbus.
Dazlyn is meant to be forthright and honest, but Norbus is gruff and cautious. You can edit these descriptions depending on the backstory you have created to get the players here. They are only there to help you create believable and playable characters.
When the players reach E3, “Courtyard and Temple Facade,” they are meant to meet these NPCs. The dwarves thank the player characters (PCs) and offer their quest, however, depending on your party, this might seem a little boring.
Hopefully, by this point, you will already know what your players will enjoy. If they like to roleplay, then you can use this entrance to make Norbus suspicious.
“White Dragon! What lies! These clean folk are after that legendary gem. I can smells it!”
The players could then roll persuasion to convince the dwarfs, and at the same time, learn about the tempting treasures within. If you use this method, you may want to create a more interesting item than a 100gp gem. Maybe it is cursed, and the PC who holds it becomes obsessed with getting more money even if it ends in pain. Who knows, have fun with it!
If your players are still new and not confident enough to roleplay, you might prefer more of a damsel in distress attitude. Maybe they hear a call for help and rush to the dwarf’s rescue. As they arrive, one dwarf is whacking their pickaxe against the Jelly, while the other is slowly being digested.
Thrown straight into battle, the players have to kill their enemy before the dwarf dies. This makes the combat dynamic, includes a scary time element, and lets you play around with roleplay without it being core to the game.
If you have no idea what your players will find fun, create the scene to be fun for you. You are a player in this game too, so use your own entertainment as a guide and see how your friends react.
Next time, it will be easier to see what they enjoyed.
Learn the NPCs and the Monsters
In this quest, there are only two NPCs and two monster types. This means you don’t have to focus on a whole village and what they all want, instead you can put some time and love into the characters in front of you.
Monsters
When it comes to the Orcs and the Ochre Jellys, you don’t need to give them backstories or names (unless you want to!). Instead, all you need to do is know their aim and know their attacks.
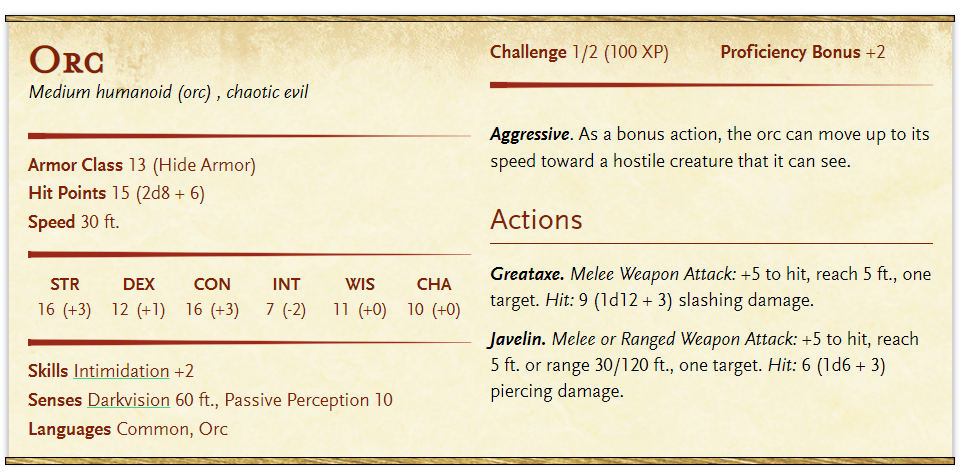
We will go into more detail about the Orcs later, but their main goal is to settle somewhere, and they are willing to die for their course.
The Ochre Jellies were once living dwarfs, but they were attacked by their god and turned into these hungry and ugly beasts. It’s unlikely that your players will have a way to communicate with the jellies, so you don’t need to understand their motives other than “attack.” The fun thing about Ochre Jellies comes from their movement. They cannot move fast, but they can climb walls without issue and squeeze through gaps as small as 1-inch without worry.
When it comes to battle, remember the quirky and unique moves that each of your monsters have, and be sure to bring them to the table. Even if spider climbing up a wall gives a player an opportunity attack, the move will still be memorable!
Non Player Characters
The dwarves are given commoner stats, which you can find on page 55 of the adventure book or page 345 of the Monster Manual.
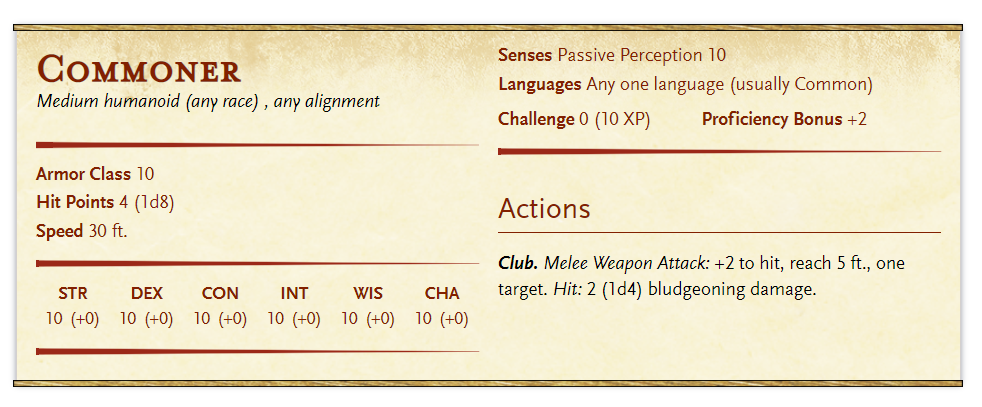
This stat sheet says that commoners only have a club for attacking, but let’s consider a real miner. They would likely have a pickaxe, at least! Just because the stat sheet says, one thing doesn’t mean you cannot add some flare to it.
I suggested earlier that a damsel in distress could consist of a dwarf being swallowed by a Jelly while another attacks with their pickaxe. In that scenario, I recommend keeping the mechanics of a club but adding some imagination to their weapon description. This way, you haven’t changed the details to become complicated, and you haven’t overpowered the NPCs.
Of course, there is more to an encounter than battling, and the NPCs will have their history. You don’t need to write a whole plot about these characters, but make them memorable in your head, so when the players talk to them, you can create a response consistent with their character.
I suggest making a character sheet for any NPC, with their attitude, goals, dislikes, and likes. This way, you have a quick reference for improvised conversation.
Loot
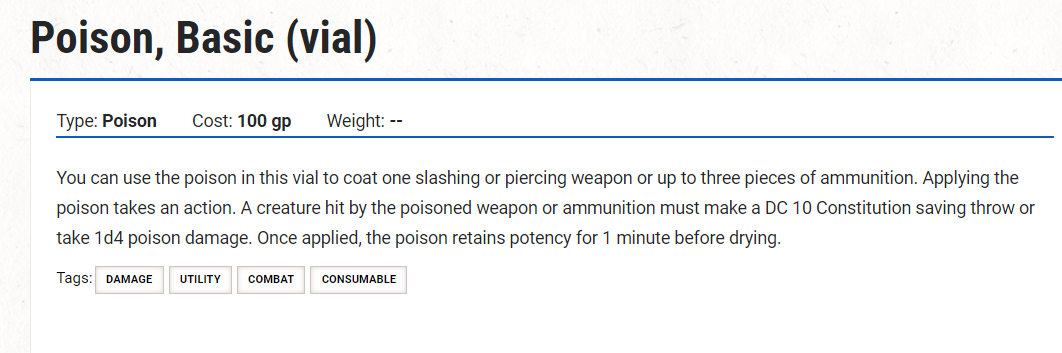
If anyone dies, it’s always fun for the players to loot the bodies and try to find treasure. For the Dwarven Miners, they could find alcohol, small gems worth 10gp, and some pickaxes. For Ochre Jelly, they could find poison that could be filtered into empty bottles.
The Orcs, however, could be more interesting as the player can find armor and weapons. Orcs wear hide armor and carry Greatclubs along with Javelins. These could be added to your player’s inventory and increase their fighting power. These items can be found on pages 41 and 42 of your Essentials Kit Rulebook or pages 145 and 149 of the Player’s Handbook.
Break Down Each Area Of The Map
In the official guide to the Dwarven Excavation quest, there are 13 sections, including the arrival and the Orc attack.
Temple Features
There is a helpful little guide on page 22 about the temple’s features, including its doors, ceilings, difficult terrain, and light. I suggest printing this part out and having it in view, as there will be many times when light and terrain becomes a problem during the game. These are easy features to forget but are an intricate part of the atmosphere building and difficulty challenge.
Remember that difficult terrain takes twice as long for a character to go through (30 ft of movement turns into 15 ft, etc.), and having no light will make your characters effectively blind. This means that they will automatically fail any check which uses sight and will be disadvantaged when attacking, while their enemies will have advantage to attack them (if they can see).
Even if your players have darkvision, they will be disadvantaged on checks that rely on sight.
Because of this, you should make a pre-worded description for every room the PCs enter, so both you and them are reminded of their limitations. If a character is blinded from the darkness, consider giving them the condition card found in the pack as an additional reminder.
Going Through The Rooms
I’m not normally a fan of maps with useless rooms, as the DM is forced to make it important somehow, or the players become bored by constantly seeing useless information. However, this map doesn’t have too many dead spaces, and because the Ochre Jellies can wiggle through 1-inch spaces, they can use these dead rooms as escape ways to run away from the party.
You can even use the strange shapes in the Ruined Settlement (E2) as cover when the Orcs attack.
My only suggestion is to add more detail to the rooms. The priest’s room in E8, for example, could have jeweled silver daggers or blood-red leather armor for the players to find. If the players don’t go rummaging, then they won’t lose out on important items, but if they snoop around, they could find some worthy treasure.
No matter what you do, be familiar with the rooms and understand how they could be used by your players or by the monsters. Read each section one at a time, and then go over them with a pen and paper to create your own descriptions and changes.
Change Abbathor to Talos
Earlier I said to ignore the history of this place, as it never comes up again in the campaign. If you really want a god in this temple, as you know your players will get interested in the history, then I suggest using Talos, the evil god of storms.
If anyone investigates the rocks, you can suggest high levels of sea salt, despite being far away from the sea; almost as though previous landscapes would put this temple closer to the sea edge.
Talos shows up in at least four other quests as the Half-Orc anchorites constantly try to summon him or work on his behalf. This temple could be an abandoned worshipping site, which was left behind as the sea levels changed.
Swapping Abbathor to Talos will give you a recurring evil god that feels connected to the story.
Getting Battle Ready
Unfortunately, the beginners kit doesn’t come with a battle map for every quest, so I suggest buying a reusable battle map that can be wiped away and recreated as the players destroy the temple within.
If someone uses a spell that knocks down a pillar, for example, then you’ll need to re-make this map as the ceiling collapses.
The only problem with this method is allowing your players to run all around the mine while only having a limited battle map size. Although I would normally suggest using one massive and wipeable surface, for a map like this, you may prefer to use reusable battle blocks. Click this link to understand what I mean. You can add in more corridors as your players discover secret doors. These battle blocks create a more versatile and moveable map.
Avoid Player Disappointment
The one thing that every Dungeon Master hates is disappointing their players. If the Ochre Jelly encounter proved deadly, you need to give your players a break before letting them face the Orcs.
Encourage them to take a short rest at least, or even allow them a long rest in the creepy, moldy priest chambers. If they don’t take a rest (because they didn’t know they could), your players will feel ambushed as the Orcs come to attack.
The tiny paragraph about the attack on page 23 suggests you go into a fight without explanation. This will feel like an unnecessary attack to your players, so instead, I recommend adding in a little bit of dialogue to show why the Orcs are fighting.
If a player knows the language “Giant,” you could have the leading Orc give a speech while a timid one mumbles something only that player can understand.
“A cave!” The Orc says with a gaping smile that shows off his long, deep tusks. “Humanoid vermin, be off with you. This is our new home!” He raises his great club and charges before anyone gets the chance to run.
Point out your giant-speaking player, and tell them they notice this interaction too:
A smaller Orc raises his ax, but his enthusiasm is lesser than his friends. “Another fight? I’m too exhausted. Why won’t you let us be!” He mumbles in Giant, but with a huff, joins his comrades.
If you don’t have a player character who can speak giant, you can still have this interaction through common.
When you add this level of information to your players before the attack begins, give them enough space to attempt to speak before the Orcs reach them. If the charge happens when they are over 40ft away, the monsters have to use the dash action to get into melee range. This gives the players one turn each to interact without attacking and get more information.
Although Orcs have javelins, their low intelligence makes it easy to imagine them running into melee combat and not staying in ranged distance.
However you manage this element of attack, remember that the Orcs are searching for a new home after the white dragon displaced them. This can be a great way to weave Cryovain and his negative effects into the story.
It will be easy to let this quest fall into a “dungeon grind,” especially at a low level. A “dungeon grind” is when the players experience battle after battle without any change. Even those who love battles still need a balance with puzzles, social interaction, and downright silliness.
You should decide whether this additional attack will be enjoyable and informative or if your players need a break from fighting. If you figure it’s the latter, you should abandon this extra fight.
Summary
There isn’t a lot going on in this quest, which is perfect for a new DM and new Players. There is a little bit of social interaction, a little bit of battle, and a little bit of investigation. I really like this quest and only felt the need to edit a bit of it.
When I played it through with my party, we had a Dwarf Wizard, so when they stole the gem, I made Abbathor talk to her in her sleep. Our campaign had two plots from then, stop the dragon and release the evil god.
I highly recommend cutting out all the Abbathor stuff, unless you think your players will be interested in this back story. He doesn’t come up again in the campaign, so you won’t be missing out on information. If you want to add in an important god, add in Talos instead.
Whatever you do, make reminders about the light and difficult terrain either through pre-written entrances for each room or with a sticky note on your DM screen.
And remember to have fun!
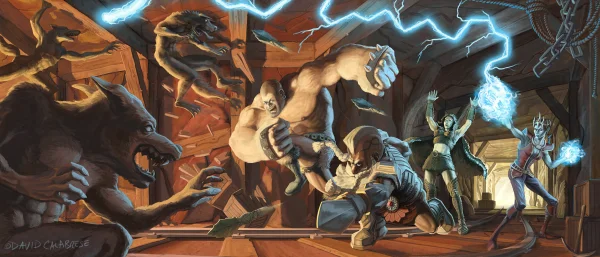
Feature Image CC: David Calabrese
